THE GREATEST RACE I: DESIGN & BUILD A FLYING MACHINE
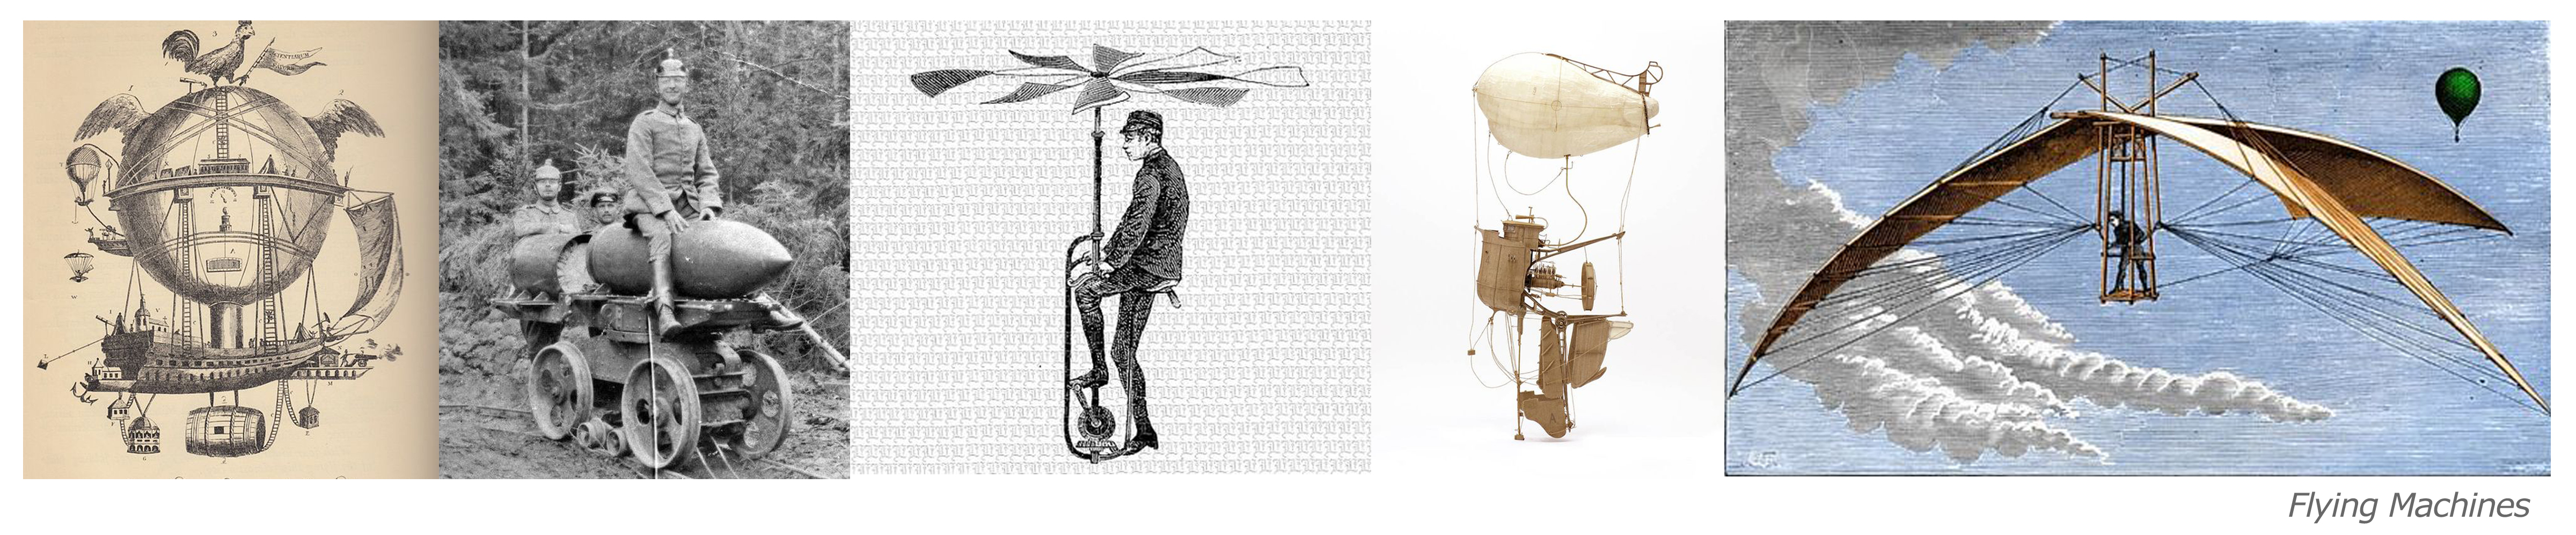
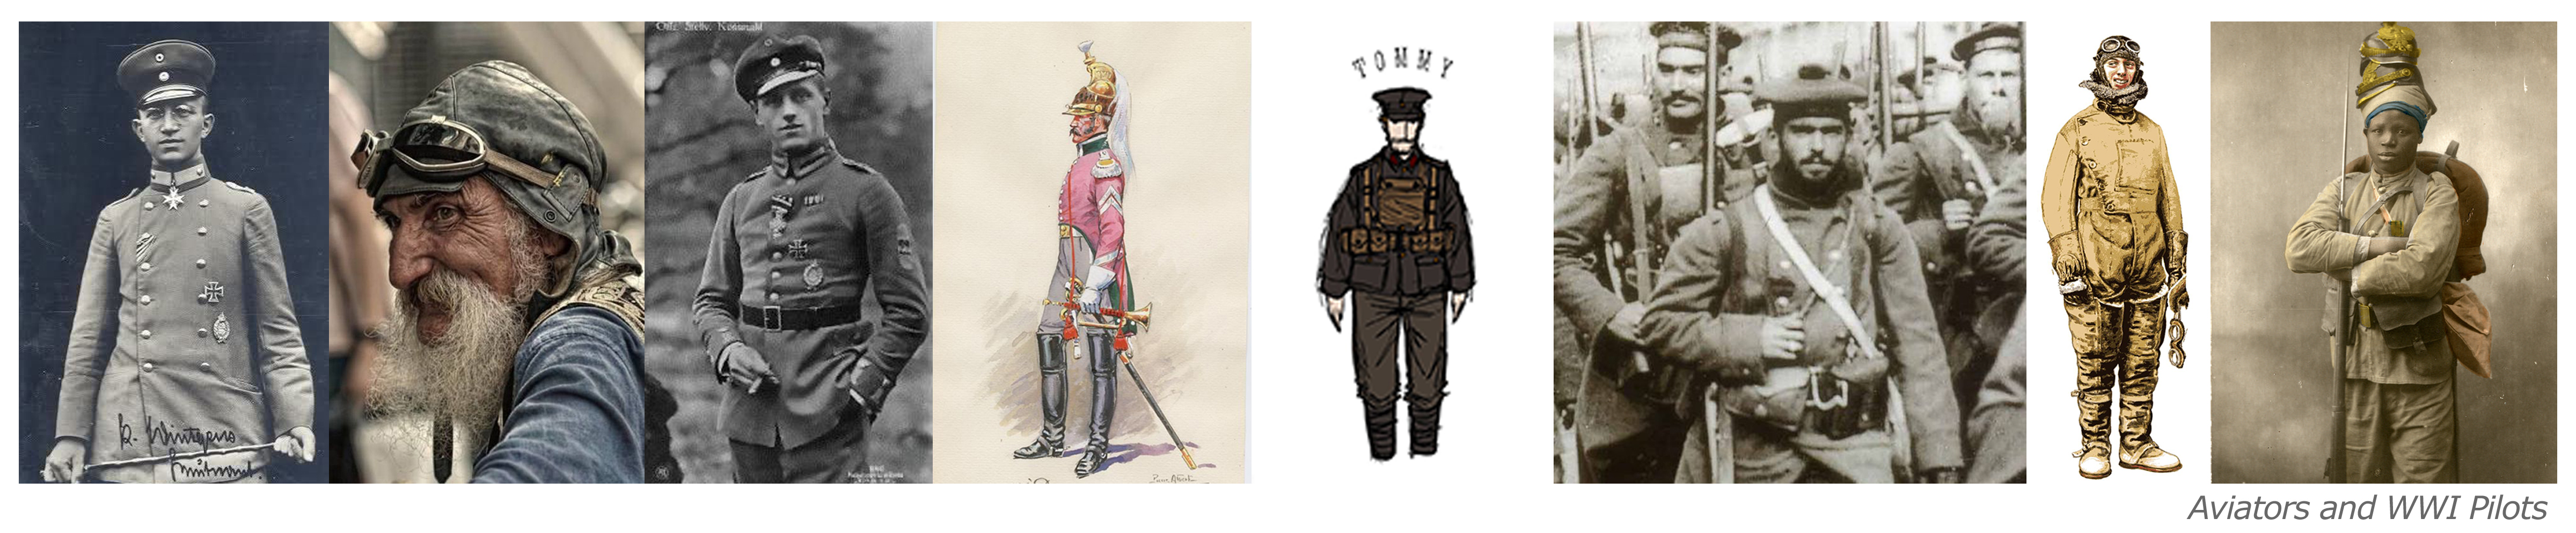
The Greatest Race is and attempt to be the first flying machine to fly around the world. The time period is a fictional version of the 21st century as seen through the lens of the 19th century. Like today, the late 19th century was a world on the cusp of scientific discovery and the possibilities for invention seemed endless. Think Jules Verne's 20,000 Leagues Under the Sea or H.G. Wells' Time Machine. These authors used the mechanical tools of their day; gears, levers, pulleys and steam, to concoct a menagerie of fantastic machines that defied the laws of nature as they knew it. What's truly fantastic is that many of these dreams came true in the 20th century!
Your assignment is to research and design a flying ship and an aviator that you think is capable of winning a race to circumvent the globe. . . or go down in flames trying. Your flying machine must be a derivative of late 19th century technology, the mode of propulsion must be evident from the out side of the vehicle utilizing spinning blades, belching turbines, spinning pedals, hot air balloons, etc.. and your Aviator must be visible from the exterior of the flying ship.
Later on we'll be building out a location from a part of the world you would like your scene to take place in.
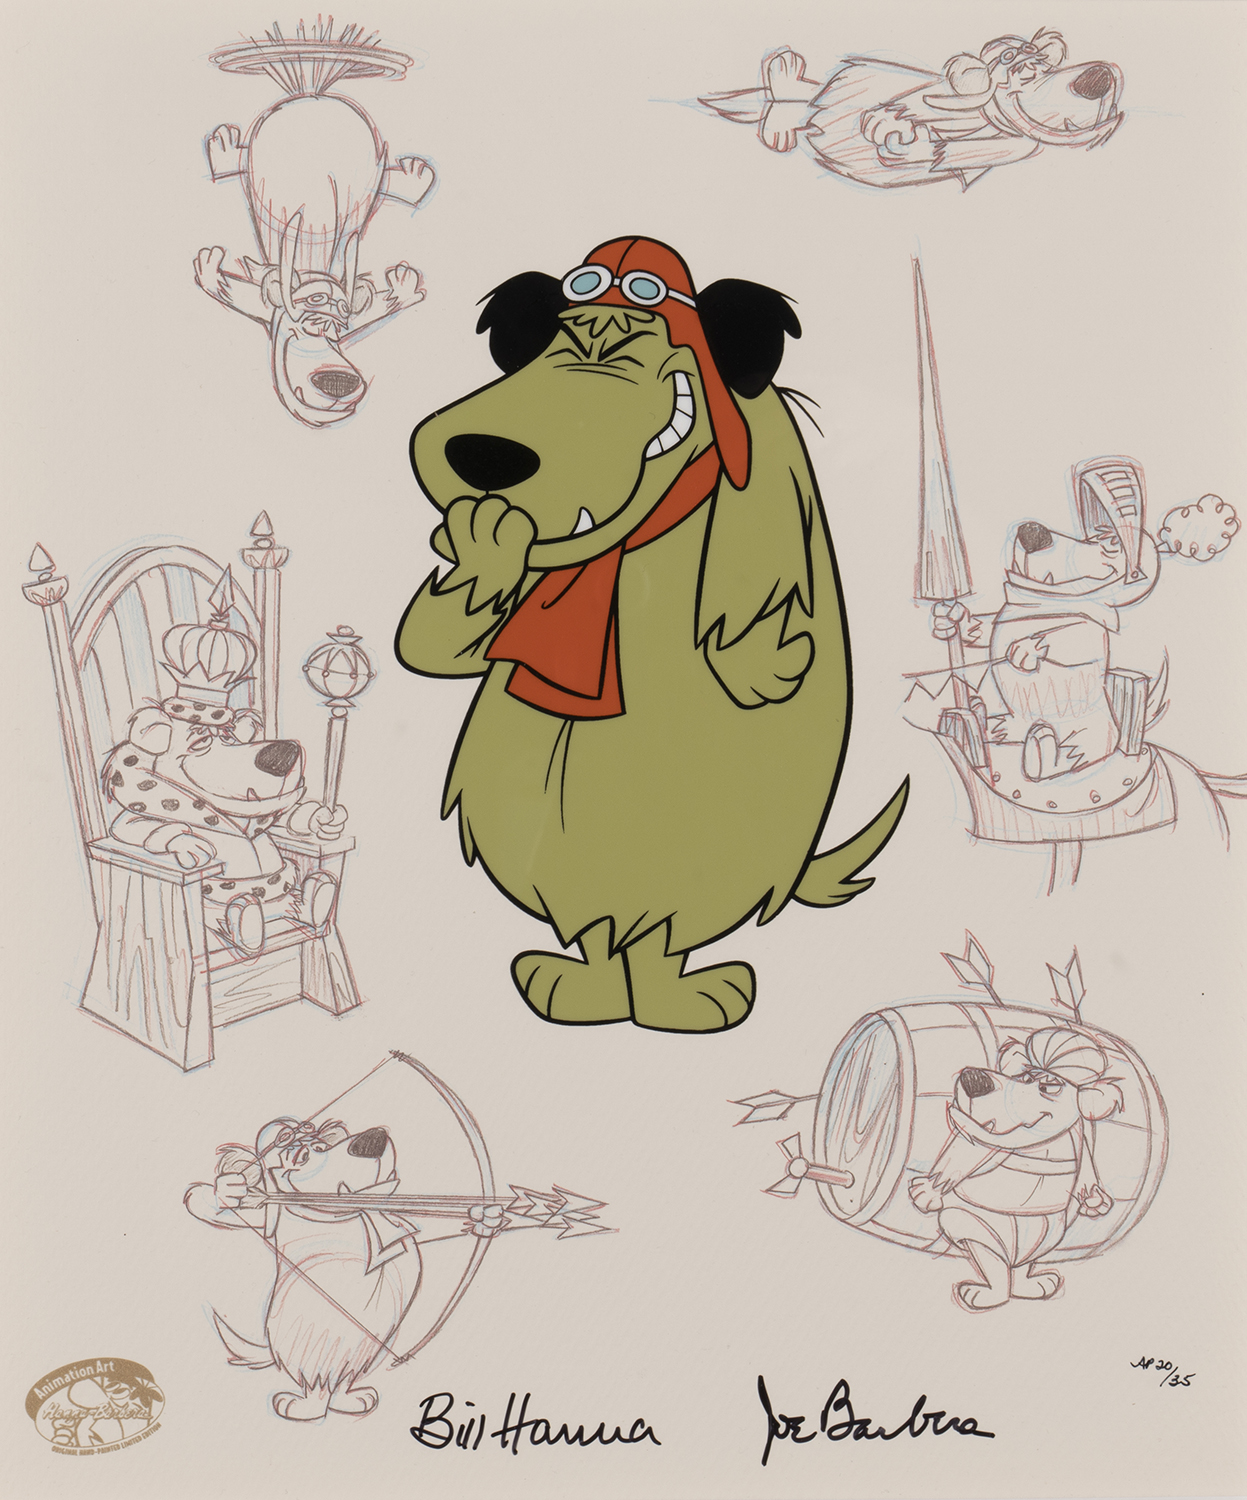
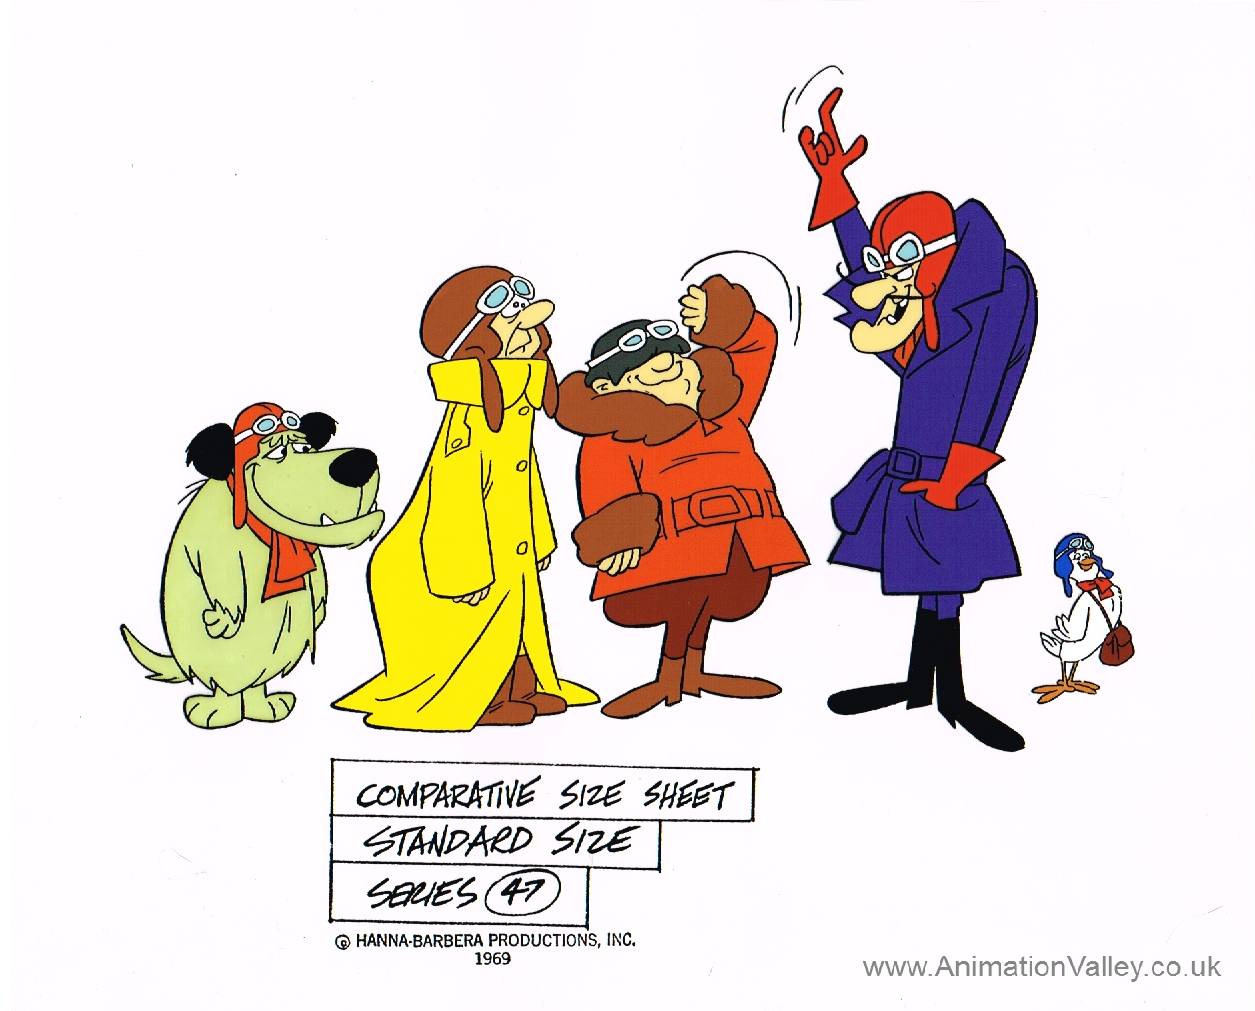
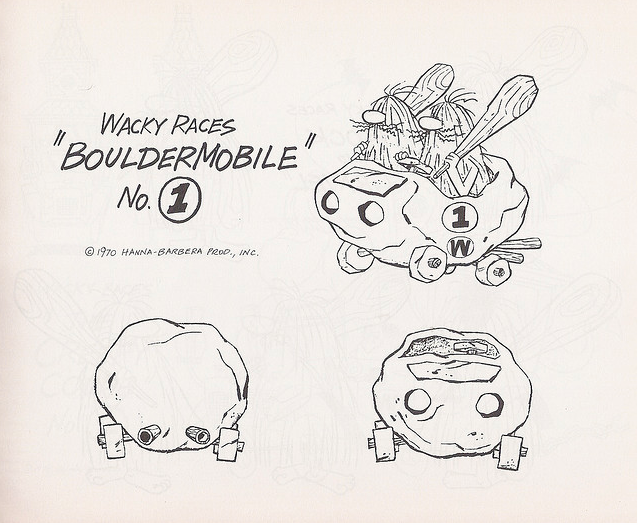
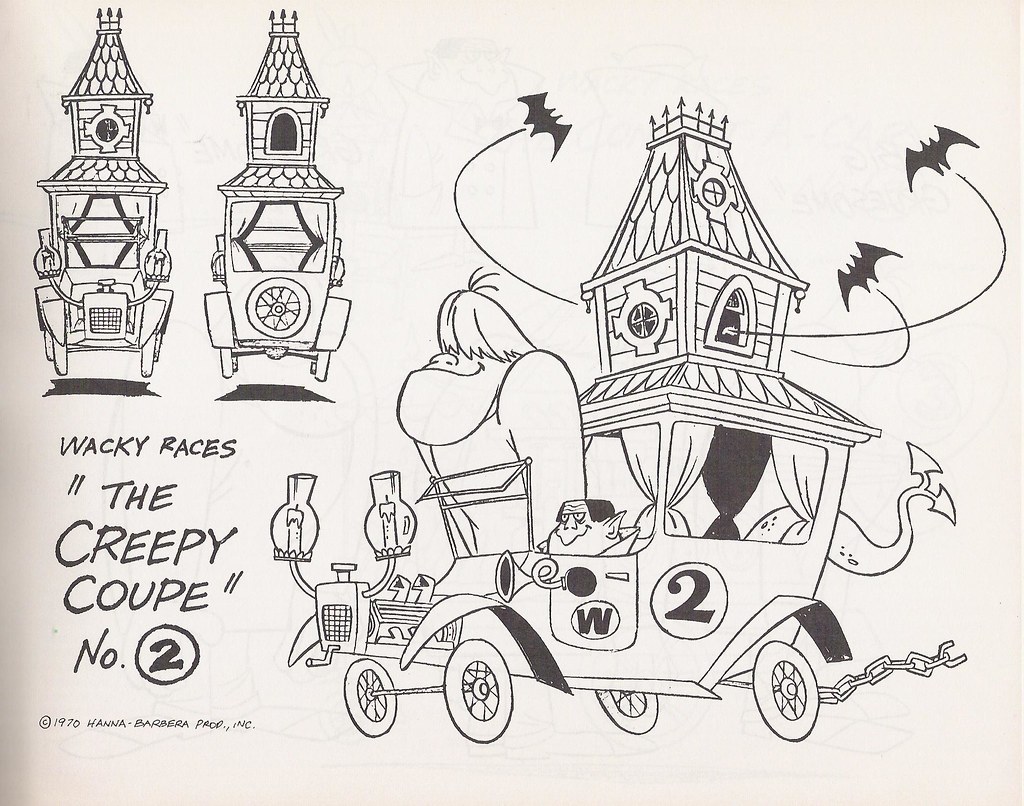
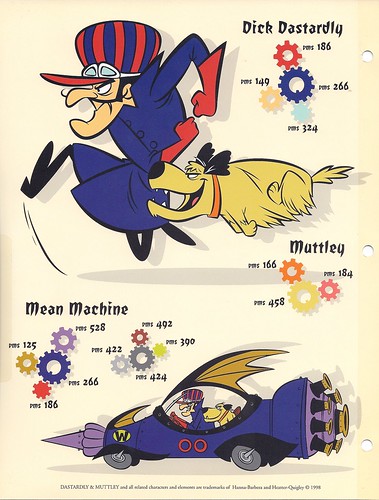
. . . and one more thing. To keep these projects from getting too complex visually, we'll be taking our visual queues from the 1970's Hanna Barbara classics, Wacky Racers.
Assignment Steps:
1. Research Flying Machine & Aviators
6. Rigg and Activate Flying Machines
7. Share Flying Machines in the Asset Library
Pintrist Page: Create a Pintrist Page called Aviators and Flying Machines. No less than 50 pins.
Research Pages: Download your most relevant images to a Research Folder in your Flying Machine Project and compose onto two separate Research Pages.
Naming:
simpsonb_flyingMachine_research.jpg
simpsonb_aviator_research.jpg
The Exploration Sheet is where you bring the best examples of your design search together on a single page.

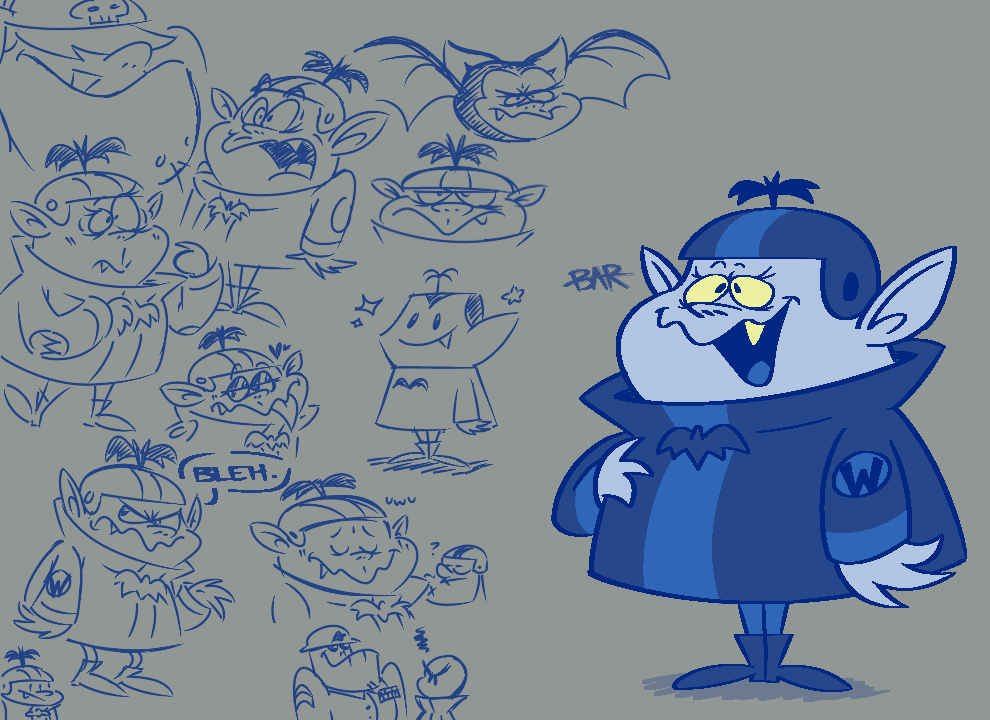
Exploration Sheets: Based on your research create multiple sketches for your Flying Machine that include your Aviator. Compose the most promising of these sketches in Photoshop and export a single Exploration Sheet as a jpeg.
- Simple sketches will do, exploring a variety of design options.
- Compose a minimum of 3 Flying Machines option on a single page along with their respective Aviator.
- Post Exploration jpeg to the Discord Channel.
Naming:
simpsonb_flyingMachine_exploration.pdf
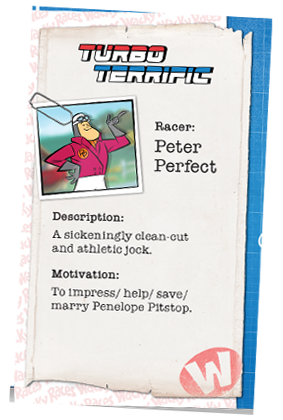
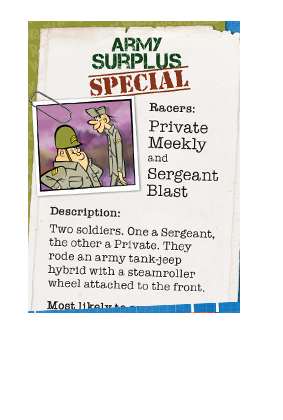
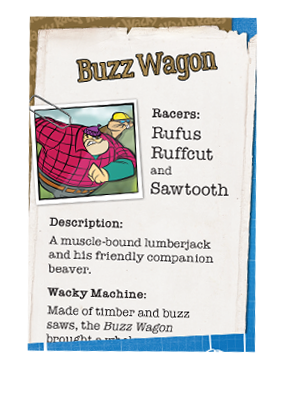
3. Trading Card Bios
Now that you have determined a direction for your designs the fun begins. Come up with a name for your Flying Machine and dig into the background of your aviator to come up with a brief biography. Something that would read well on a trading card.
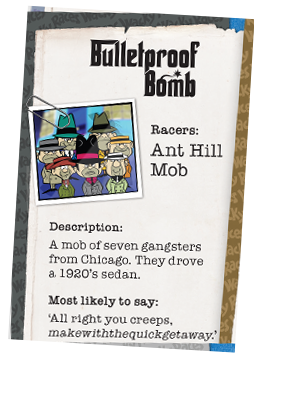
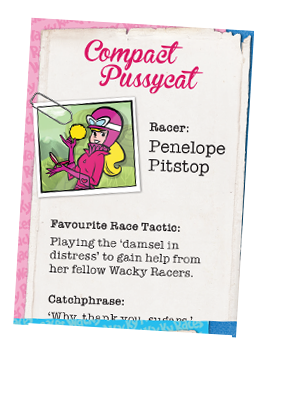
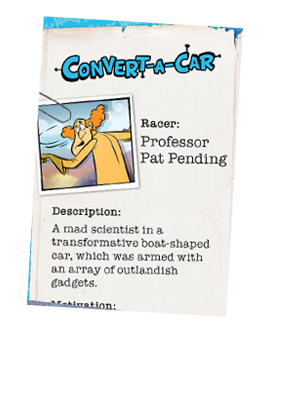
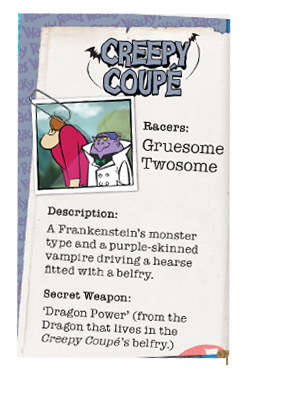
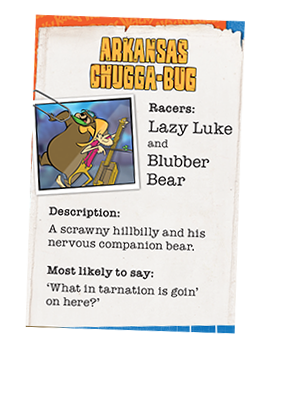
Name & Brief Bio: Name your character and their Flying Machine. In addition, provide a character bio in a single sentence and describe your character's motivation "What do they want?". If you like you can include a a signature phrase. Go here for some background on Hanna Barbara's Wacky Race Characters.
Trading Card: Take a look at the trading cards above for the Wacky Racers and come up with a trading card design of your own.
- The Flying Machine name should be the heading of your Trading Card
- Include a color "snap shot" of your Aviator.
- Include your Character Bio and motivation. Signature phrase is optional.
- Post jpeg to the Discord Channel.
Naming:
simpsonb_tradingCard_newName.pdf
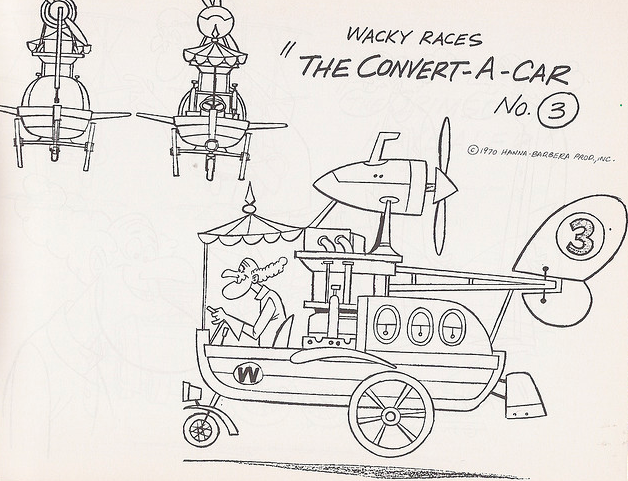
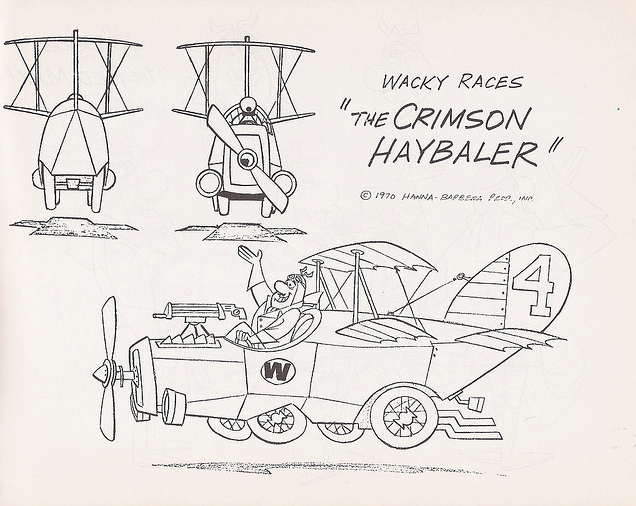
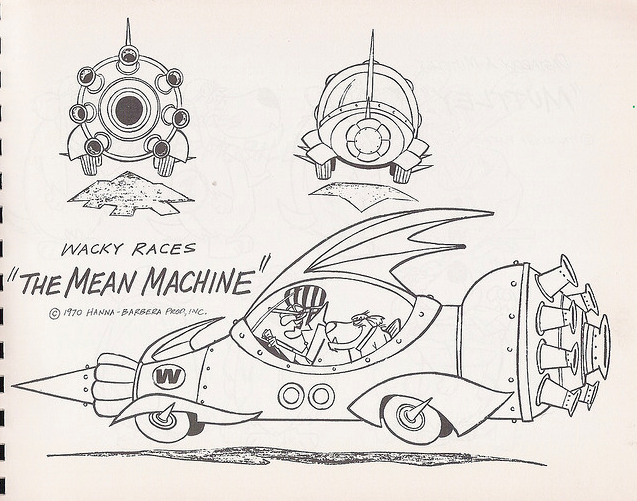
4. Model Sheet
Choose the most promising design from your Exploration Sheet and create Front and side views of your Flying Machine. Each should includes a visible aviator.
The Model Sheet is an attempt to reconcile two separate views of your Flying Machine with Aviator. Images can be drawn in Photoshop and imported into Harmony for final line work. For both views the lines should be clean and readable, and the proportions final as we will be using them as a template to build and rig our Flying Machines on.
- Model Sheet requires a front and side view.
- Be sure that the Aviator is visible in both views.
- Model Sheets should be drawn in Photoshop and exported as a jpeg. 4K px is a minimum.
5. Build Flying Machines
Build the First View: Import your Model sheets into Harmony, scale it to fit your camera view and use it as a template to build your Flying Machine directly on top of. I would begin with the view you are most comfortable with and build it to completion.
Things to Think About:
- Use the Pencil Tool to create your lines from the Line Art layer.
- Build entire elements of your Flying Ship as if it were a working machine.
- Each moving section of the Flying Ship should have its own layer.
- Your initial painting should be in gray tones designating each color in your palette to specific parts in your Flying Ship/Aviator.
Second View: After completing the first view build the second view on a separate series of layers.
Class Demos:
Flying Machine A. - Import Model Sheet & Build a BW Color Pilot in Harmony
Toon Boom Tutorials:
6. Rig & Activate Moving Parts
Rigging your Flying Machine will require getting to know the Node View. This is where we can begin to arrange the components of your Flying Machine in the proper order to camera, add pegs, and establish any hierarchies your Flying Machine will need to function.
Class Demos:
Fly Machine C. - Rig Your Flying Machine in the Node View
Once your Flying Machine is built and rigged you will want to animate any of the moving components. This can be done with keyframes or by cycling replacement drawings.
Keyframe Animation is good for actions with a mechanical feel such as rotating the steering wheel of a ship.
Replacement Animation is best utilized for organic motion like flames, billowing sails and even the rotation of propellers due to the ability to add blurred motion lines in your replacement drawing.
Cycle Animation: Whatever mode of animation you choose, you'll want to make sure you cycle your animation to fill at least 120 frames.
Master & Rumble Pegs:
Master Peg: The Master Peg is the parent of your entire Flying Machine. This is where you will animate the path of your Flying Machine.
Rumble Peg: You will want to place a rumble peg just under the Master Peg and use it to animate any rumbling (or turbulence) that may be caused by the mechanics of your Flying Machine. Remember to cycle your Rumble animation to fill at least 120 frames.
Class Demos:
FlyingMachine Rigging E - Master and Rumble Pegs - Path and Separate Animation 25:45
7. Share Flying Machines in the Asset Library
Once you have fully rigged and animated your Flying Machines you'll want to save each view as a separate .tpl file in the asset library in classFolders/greatestRace/flyingMachines.
Before you share your views be extra careful to make sure that all the parts are in order. Here's a checklist to go through before delivery.
- Does each view have its own Master Peg with the pivot placed withing the model of the Flying Ship?
- Are all control pegs named correctly and easy to access?
- Does your rigg animation cycle for at least 120 frames?
Class Demo: TB Exchange Library Tutorial.mp4
Naming:
simpsonb_flyingMachine_front.tpl
simpsonb_flyingMachine_side.tpl
Stephan Leeper - Central Michigan University 2022

