2. STORIES FOR CHANGE: 40-SECOND PSA
A. STORIES FOR CHANGE - THEME & IMAGES
B. STORIES FOR CHANGE - RESEARCH & STORY BEATS
C. STORY THUMBS - ACTION BEATS & SHOT NUMBERS
D. PRODUCTION MAP - A SINGLE SCENE
E. SCENE BUILDS II - STAGING & CAMERA MOVEMENT
F. TONAL KEYS - LIGHTING & MOOD
G. STORYREEL I - FIRST DRAFT / ROUGH CUT
H. STORYREEL II - FINAL DRAFT / SUPPORTING PDF
Plato once said that "the storytellers change the culture". For better or worse, I believe this is true. While nobody likes or needs artwork that preaches to them, what a good story can do is compel an audience to look closer, think more deeply, and perhaps be more patient with something they don't understand. Done well, and done often, thoughtful and engaging stories can't help but make a positive impact on our culture.
There are even entire festivals dedicated to this idea. Check out the list below or go to filmfreeway.com and enter "social" in the search bar. The last I did this over 2000 festivals showed up!
Socially Relevant Film Festival - New York
Social Justice Film Festival - Seattle
Show Me Justice Film Festival - University of Central Missouri
(In)Justice for All Film Festival - Chicago
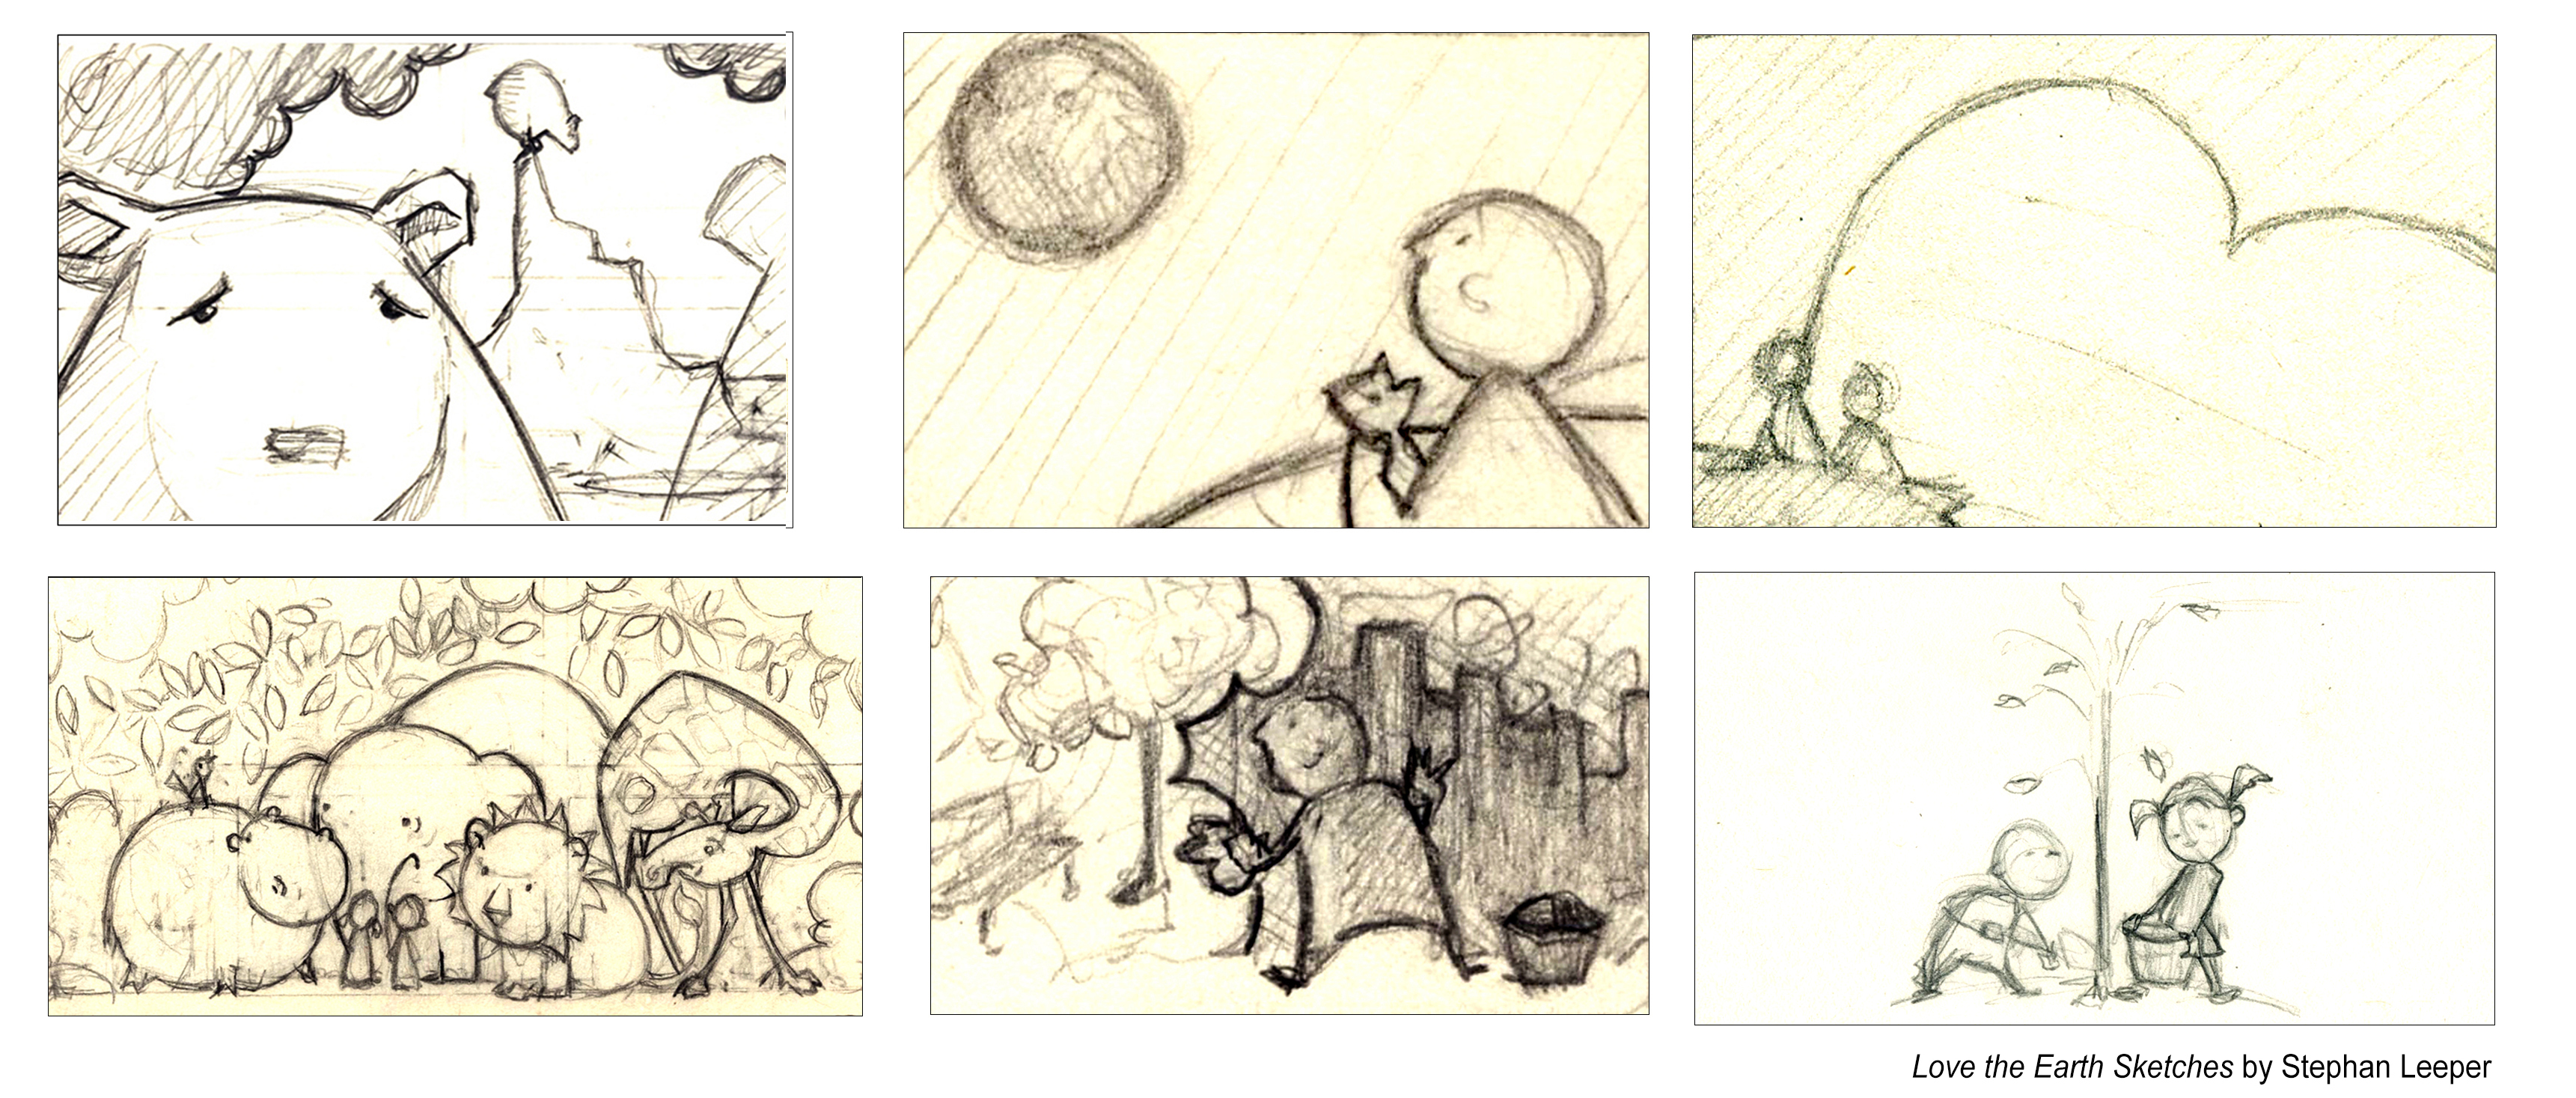
A. STORIES FOR CHANGE - THEME & IMAGES (6 drawings)
This semester, each of you will pursuing a single theme as the basis for a 40-second Public Service Announcement (PSA) that exemplifies, or amplifies a message that you think the world should hear.
By way of example, I've listed below a handful of themes that I see reflected the times that we live in. From your unique perspective, how would you add to this list?
For this assignment each of you will choose a theme you would like to explore. For this initial step your job is to create 6 images based on the chosen theme. In the best scenerio, your images should ask us to reflect on change, cause us to see circumstances differently, or appeal to the best version of ourselves.
The objective is NOT to generate controversy but to find the human story where controversy has blurred our vision.
Workflow:
Step 1. - Brainstorm . . . with your classmates for themes you are interested in pursuing.
Step 2. - Research . . . multiple stories and articles based on historical incidents or recent events that give substance to your theme and and put a human face on the abstract theme you have chosen. Choose two of the articles that stand out for you in this weeks reading guide, Research Two Articles.
Step 3. - Draw . . . Create 6 separate drawings that reflect multiple aspects of the single theme. Sketch out as many images as you can think of and then clean up the ones that stand out in a second pass.
Step 4. - Post . . . Combine your images into a single jpg and post it to your team the Discord channel for feedback. Include a caption or title for each image that gives insight into the story behind the image.
Step 5. - Comment . . . Since feedback is a valuable component of this process, make sure you are sharing your constructive thoughts with your fellow classmates.
Example: The images below are for the topic "Love the Earth"
Captions: 1. Polar Bears, 2. Blue Marble, 3. Love the Earth, 4. Peaceable Kingdom, 5. Wash Day, 6.You can help.
Submission:
- Drawings should be well composed, easy to read and named properly.
- Name your image file and upload as a single jpg to the Discord #stories-for-change channel. Include captions diectly below.
- Check out your classmate's stories-for-change posts and leave some positive comments.
Naming: simpsonB_PSA_images.jpg
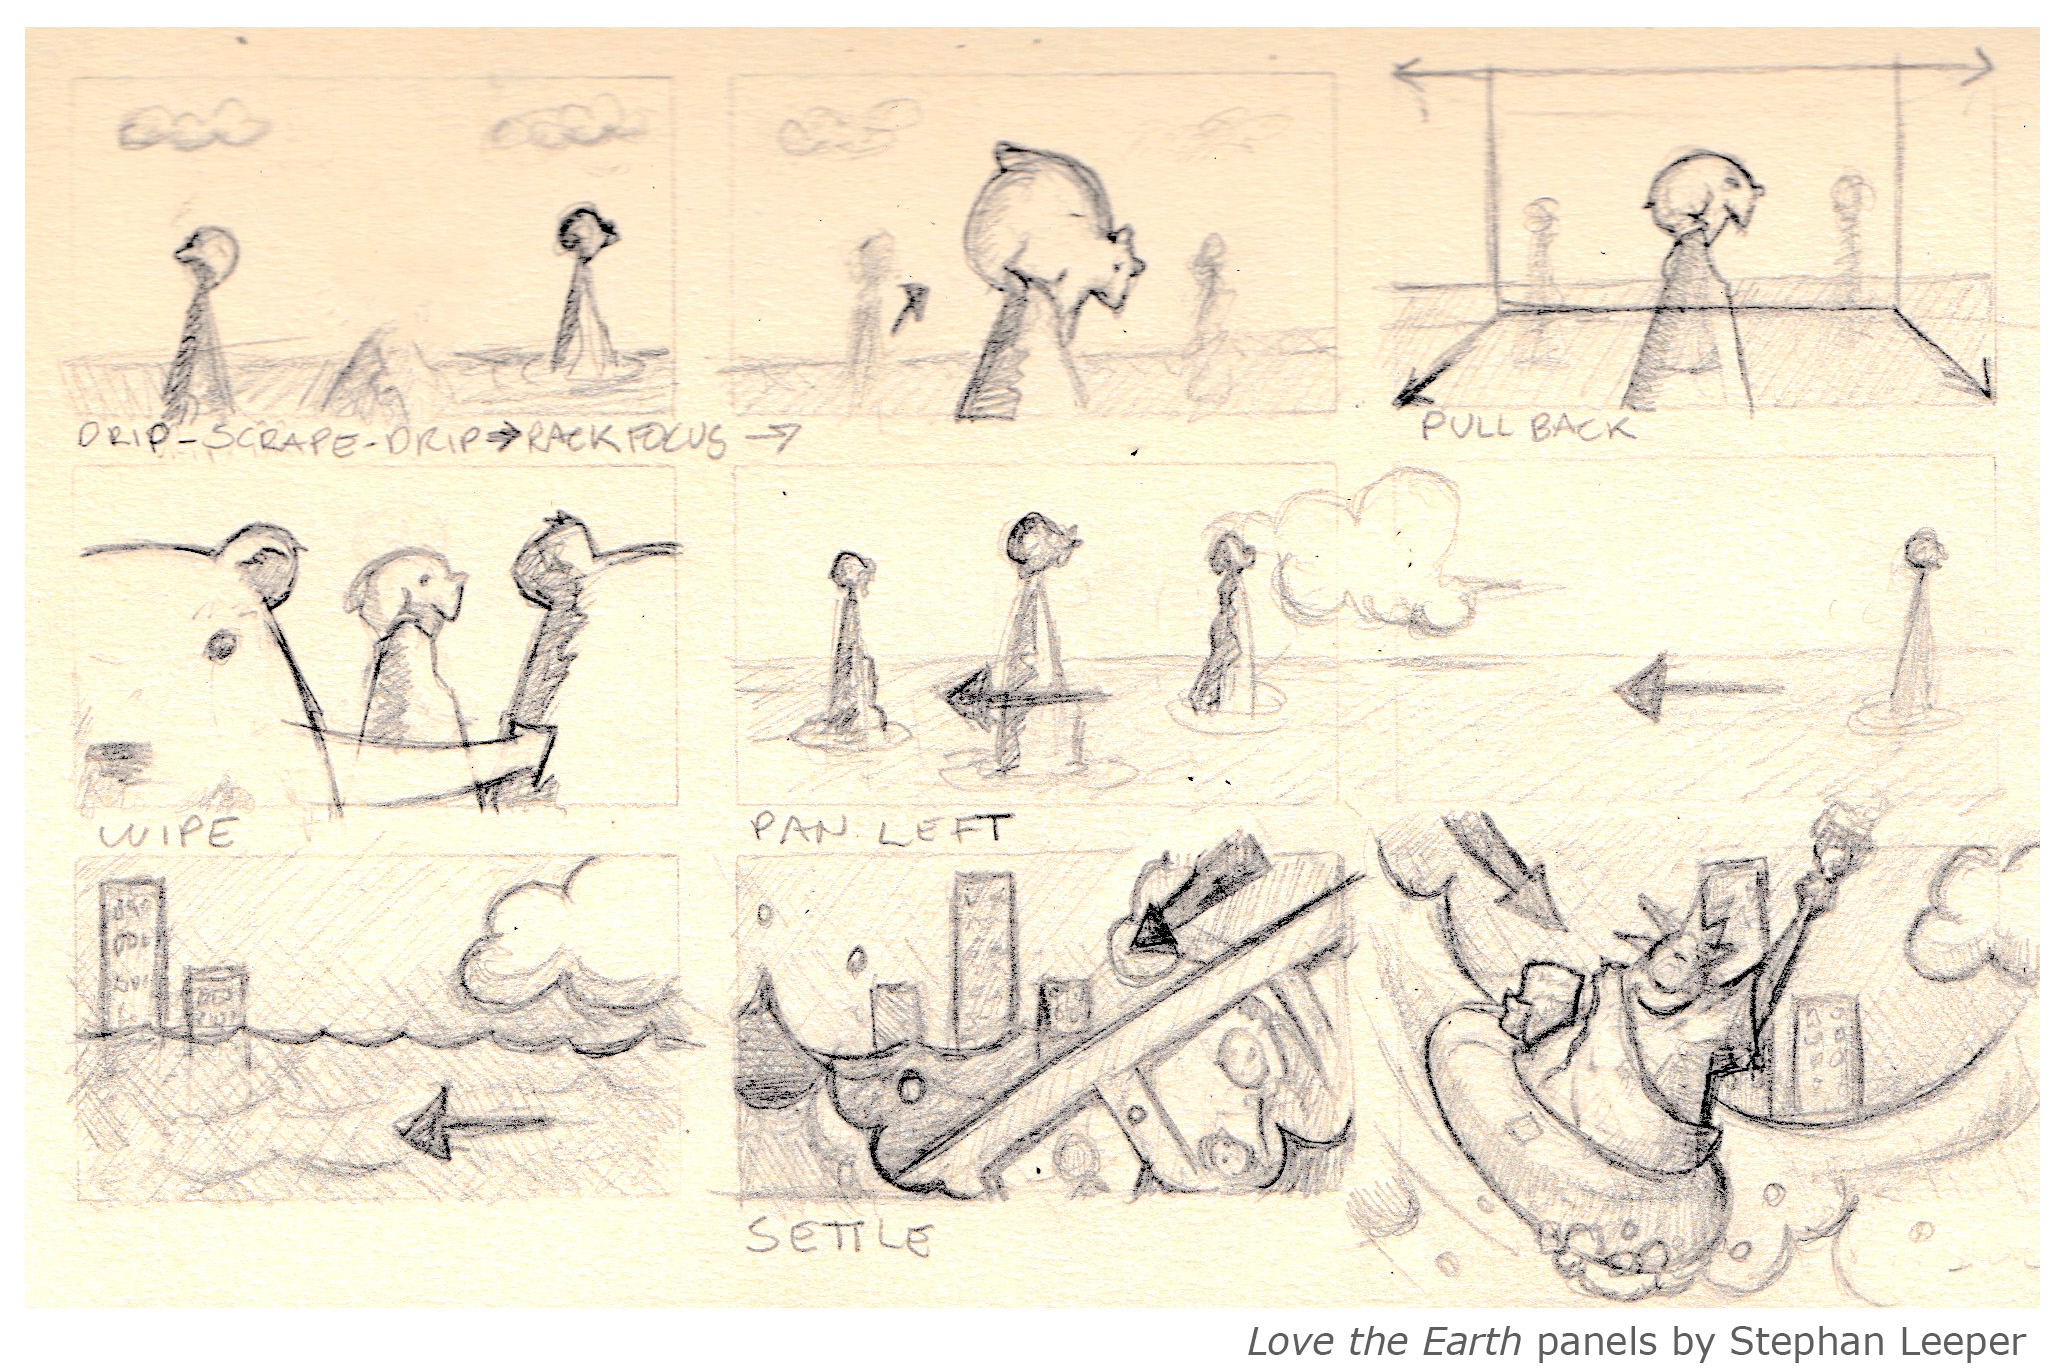
B. STORIES FOR CHANGE - RESEARCH & STORY BEATS (9-12 Panels)
Expand on one of the 6 drawings from the Images for Change assignment.
Based on feedback and personal interest, choose one of the images as the inspiration to create a simple storyline that digs deeper into the image you have chosen. You will create 9 to 12 story beats that convey a complete story arc (beginning, middle & end) for a 30- 40 second PSA. If you find you have drawn more than you need, feel free to edit them down. Save the extras because they may come in handy.
Workflow:
Step 1. - Research . . . Now that you have a more focused subject, it's time to dig deeper into your research for more specifics on the topic at hand. Site at least two sources to help guide your process.
Step 2. - Draw . . . Work in your sketchbook or use the multi-panel sheets from the Story Resource Page. Use 9 to 12 images to convey a story arc (ie. beginning, middle & end).
Step 3. - Convert . . . Once you've drawn your story beats convert them to sequential jpg files using JSL Convert and Export Story Panels Tutorial.
Step 4. - Edit . . . Use Batch Renaming in Adobe Bridge to rearrange and renumber your story beats.
Step 5. - Post . . . Zip your panels folder and post a single .zip file to Basecamp.
Step 6. - Pitch . . . Come to class ready to pitch your story beats and share insights from your research.
Example: Here are beats for the "Love the Earth" PSA
Submission:
- Submit your Research Document to the Reading Guides section in Blackboard.
- Story beats should be compressed into a single .zip file
- Upload zip file to the Basecamp 308_Storyboarding for Digital Media/308_dropbox
Naming: simpsonB_PSA_workingTitle.zip
C. STORY THUMBS - ACTION BEATS & SHOT NUMBERS
Based on the feedback from your Story Beats, you should have a pretty good idea where you need to make adjustments, what bits need to be left out and where you'll need to add drawings to make the story flow. Film craft, composition, readability and flow are essential to this stage in the process.
At this point you will expand your panel count by creating multiple action beats within a Shot. Typically each shot has a beginning, middle & end. Each shot should be framed in such a way that it moves the story forward and carries the weight of the moment that you want to convey. Every shot that has multiple actions should be represented with extra panels. Include only the essential details at this point as we will be recreating these panels digitally when we begin our Scene Builds in Photoshop.
Rewatch this tutorial for review: Shot Counts, Action Beats & Identifying Camera Moves
Workflow:
Step 1. - Adjust Beats: Make any needed adjustments to your Story Beats
Step 2. - Identify Scene/Shot Count: Identify scene/shot breaks and diferentiate between cuts & camera moves. Renumber your panels accordingly using the Batch Rename tool in Adobe Bridge.
Step 3. - Plan & Build Scenes in Photoshop: At this point each scene should have its own dedicated Photoshop file. With the original thumbnails as your guide, build out each scene as needed, isolating foregrounds, backgrounds & characters into their respective layers.
Step 4. - Action Beats: Expand single panel scenes by adding action beats. With few exceptions, each shot should have a begin, middle & end. At this point you should consider reworking your drawings in Photoshop. Use Layer Comps to create new action beats within a single scene.
Step 5. - Export Reworked Action Beats: Export Layer Comps to bridge. Rearrange and batch name accordingly.
Submission:
No submissions at this stage in the project. However, come to class ready to show your progress via Bridge.
D. PRODUCTION MAP - A SINGLE SCENE
Give some thought to how movement through character blocking and camera motion can add impact to your story. In complex scenes, you may find it helpful to create a Production Map (or Plan View) to help track blocking and camera placement. From a Bird's-eye perspective, you can track character blocking and camera placement within the set. On more complicatated sequences (like a chase scene) it is often helpful to build a map of the entire sequence.
Choose one shot that requires a camera move and create a Production Map to track the movement of both the characters and the camera.
Workflow:
Go here for detailed instruction on how to build a Production Map.
Zip sequntial JPGs and submit to Basecamp 308_Storyboarding for Digital Media/308_dropbox
File Name:
simpsonB_map_workingTitle_shot04.zip
E. SCENE BUILDS - STAGING CHARACTERS & CAMERA MOVEMENT
At this point each scene should have its own dedicated Photoshop file. With the original thumbnails as your guide, build out each scene as needed, isolating foregrounds, backgrounds & characters into their respective layers.
Rewatch this tutorial for review: Storyboard Scene Builds & Action Beats - Photoshop Layer Comps
Workflow:
Step 1. - Import Shot Panels into Photoshop: Use Tool/Photoshop/Import files as Layer in the top toolbar of Adobe Bridge to import muliple panels into a single photoshop file.
Step 2. - Clean up drawings in Photoshop: Rework dawings in Photoshop breaing them into layers (foreground, midground, background).
Step 3. - Create Mutiple Beats: and use Comp Layers to replicate movement with multiple panels within a shot.
Step 4. - Export Action Beats: Export Layer Comps to bridge. Rearrange and batch name accordingly.
Step 5. - Plot Camera Moves in Photoshop: Determine where camera motion and animated layers can best serve your piece and build your scene elements accordingly. Use the Camera Tool to build cameras in the scenes that require camera moves and plot out your moves using Comp Layers.
Step 6. - Create Camera Moves in Adobe Premiere: Watch this video before you begin. Simulating Camera Moves in Adobe Premiere.
Submission:
No submissions at this stage in the project.
F. TONAL KEYS - LIGHTING & MOOD (6 panels)
Create a Tonal Script for your PSA that will help us understand lighting and mood.
Tonal Palette: Choose the key story beats in your PSA to develop a visual guide for how lighting and tone will play in your final piece. Limit your palette to five swatches (white, black and three grays). If time allows you will evenyually apply these tones to every scene in your animatic.
Go here for detailed instruction on how to build a Tonal Key in Photoshop.
Submission/Specs:
- 6 panels worked in a single Photoshop document.
- Exprt as a single .jpg
- Upload to the Basecamp 308_Storyboarding for Digital Media/308_dropbox
Naming: simpsonB_PSA_workingTitle_tonalScript.jpg
G. STORYREEL I - FIRST DRAFT / ROUGH CUT
At this point you basically have your panels in the right sequential order and, with the help of a tempo track, an quickly establish a general pace for your film. This is what we call a "Rough Cut". From the rough cut you may see gaps in your storytelling, missing panels, and opportunities that may not have occurred to you in the initial action beats. This is where the second and third pass come in as you refine your storytelling.
Watch these videos for review: Six-Panel Fiction - Premiere Pro
Workflow:
Step 1. Set up project and import assets into Premiere Pro. To begin the storyreel process, all of your assets to be stored in a single project folde
Step 2. Import your entire "Panels" folder into Premiere followed by the Tempo track that best supports the pace of your story. Drag the panels and tempo track into the timeline and pace the panels along the beats on the tempo track.
Step 3. After adjusting the timings of your panels add black frames and fades. Combined, these should give you a general sense of pacing for your film.
Step 4. Add audio FX and any scratch score that supports the emotional tone of your PSA. Rework your timings allowing for the sound to help drive the story. Add title card, fades and/or dissolves.
Step 5. Add any drawings that help your continuity and elevate your storytelling. Use your sketchbook story template, or work directly in Photoshop, to create more panels. Repeat step 2. to get the new panels onto your timeline.
Pro tip: If you keep the same path and name of a particular panel, you can overwrite the image and Premiere will auto-magically update the image in your timeline.
Step 4. When you are happy with the results, export your movie. If at any point you get lost consult the Six-Panel Fiction - Premiere Pro.
Step 5. Once you have exported your storyreel be sure to watch it a couple of times. If you like what you see, name the movie file and and submit it to the Basecamp. If not, go back in, make adjustments, and re-export until you are pleased.
Specs:
- Export movie file 1920 x 1080 H264 with sound
- Once exported, add a date to the end of your movie file to keep track of revisions.
Submission:
Upload Rough Cut Storyreel to 308_Storyboarding for Digital Media/308_dropbox
Naming:
simpsonB_PSA_workingTitle_031223.zip
H. STORYREEL II - FINAL DRAFT / SUPPORTING PDF
After applying any notes from your rough cut review to your Final Storyreel, compile a single .pdf of the elements listed below and submit them both to the Basecamp 308 Final Project.
1. FINAL STORYREEL – A finished movie of your project should be submitted at 1920 x 1080 H624 Compression. Be sure to include a six-digit date to the file name.
A. Must include scratch audio - Sound fx and score combined are recommended.
B. Call to Action and URL for further inquirey - A short, easy to read, statement telling your audience what they should do, or how they should think about the knowledge you have shared with them. Include a url to a website for further inquirey.
Call to Action: The impact of Global Warming is closer than you think"
URL: To learn more go to www.nationalgeographic.org
C. Final credits - A seperate panel for audio effects and music credits.
2. SUPPORTING PDF - Include the following as a single PDF file.
A. Image from your Storyreel. Color is optional.
B. Title - Give your project a brief descriptive title. Example: "Polar Bears in New York"
C. Descriptive/Research Paragraph - Write a short paragraph describing the area of change your PSA addresses. Site your research source from your reading assignment and tell us the change you would like to see as a result of your PSA.
D. Include Tonal Script
Submission: Submit the following two items to the Basecamp 308_Dropbox/Stories for Change - Final Submission folder inside a new Basecamp folder.
Storyreel: simpsonB_PSA_polarBears_092920.mp4
Supporting PDF: simpsonB_PSA_polarBears.pdf
Stephan Leeper/Central Michigan University 2024