3. SCENE BUILDS I. SHOT COUNTS & BLOCKING
4. SCENE BUILDS II. CAMERA MOVES
5. STORY REEL I. ROUGH CUT ROUGH CUT EDIT
6. STORYREEL II. FINAL REVISION / STORY TREATMENT PDF
1. STORY THUMBNAILS (15-25 panels)
Now that you have your main story beats you can begin working out the visual flow with action beats and transitional elements. We call these "Thumbnail" panels because of the small, quick-sketch nature of your drawings at this stage. Film craft, composition, readability and flow are essential to this stage in the process. Each shot should be framed in such a way that it moves the story forward and carries the weight of the moment that you want to convey. Every shot that has multiple actions should be represented with extra panels. Include only the essential details at this point as we will be recreating these panels digitally when we begin our Scene Builds in Photoshop.
SOME THINGS TO CONSIDER: Because you are sowing the seeds of an actual film at this point, it's important to take a moment to consider your film making options.
Story Structure: Consider experimenting with the order of events. There is no reason (except maybe for clarity) that you need to tell your story in linear time. Can you start your film from the end of the narrative and work backwards? How much of your story can you avoid telling by letting your audience fill in the gaps?
Point of View: From whose perspective is the story being told? Does the audience know more than the characters or are they also discovering clues as the plot unfolds? Your answer will determine whether you begin with an establishing shot, informing your audience of everything, or whether you begin with extreme close-ups, keeping your audience guessing as each new plot point is revealed?
Camera Placement and Motion, Staging and Scene Length. Give some thought to the placement of your camera and how you are staging your characters. Will you be shooting in long takes or quick cuts? Will you move the camera or the characters, or both? Will a single wide shot or multiple close-ups best serve the scene? If you need to, take a minute to make a quick map, or plan view, of your locations to help you understand the progression of your story through space, or the staging of a difficult scene.
Lens Choices and Image Space: Will you be shooting primarily in deep, flat or limited space? Will you use wide-angle focal lengths to place your viewer inside the scene accentuating depth and adding intensity? Or will you use longer lenses that compress space, distance and focus, placing the viewer outside the scene to create a voyeur-like intimacy?
EXAMPLE:
WORKFLOW:
- Think through some of the strategic questions listed above before you begin.
- Use the flexibility of limited panels to experiment with the structure of your story by rearranging them in Adobe Bridge.
- Draw lots of images and when possible expand on visual possibilities! Work small to save time, ignore unnecessary details, and focus on composition and readability.
- Create as many panels as you need to for your story to flow. A panel per action beat will suffice at the stage.
- When you are done with your first draft use Batch Rename in Adobe Bridge to preserve the order of your images.
- Finally, practice your pitch! Make adjustments and practice again. When you are pleased with your pitch, name your panels folder, compress, and the upload your the .zip file to Basecamp.
SPECS:
- Work in a 16:9 aspect ratio
- Images should focus on composition, readability and flow
- Compress into a single .zip file and upload to Basecamp.
Submission: Basecamp 308_dropbox/Final Project/
Naming: simpsonB_workingTitle_thumbnails.zip
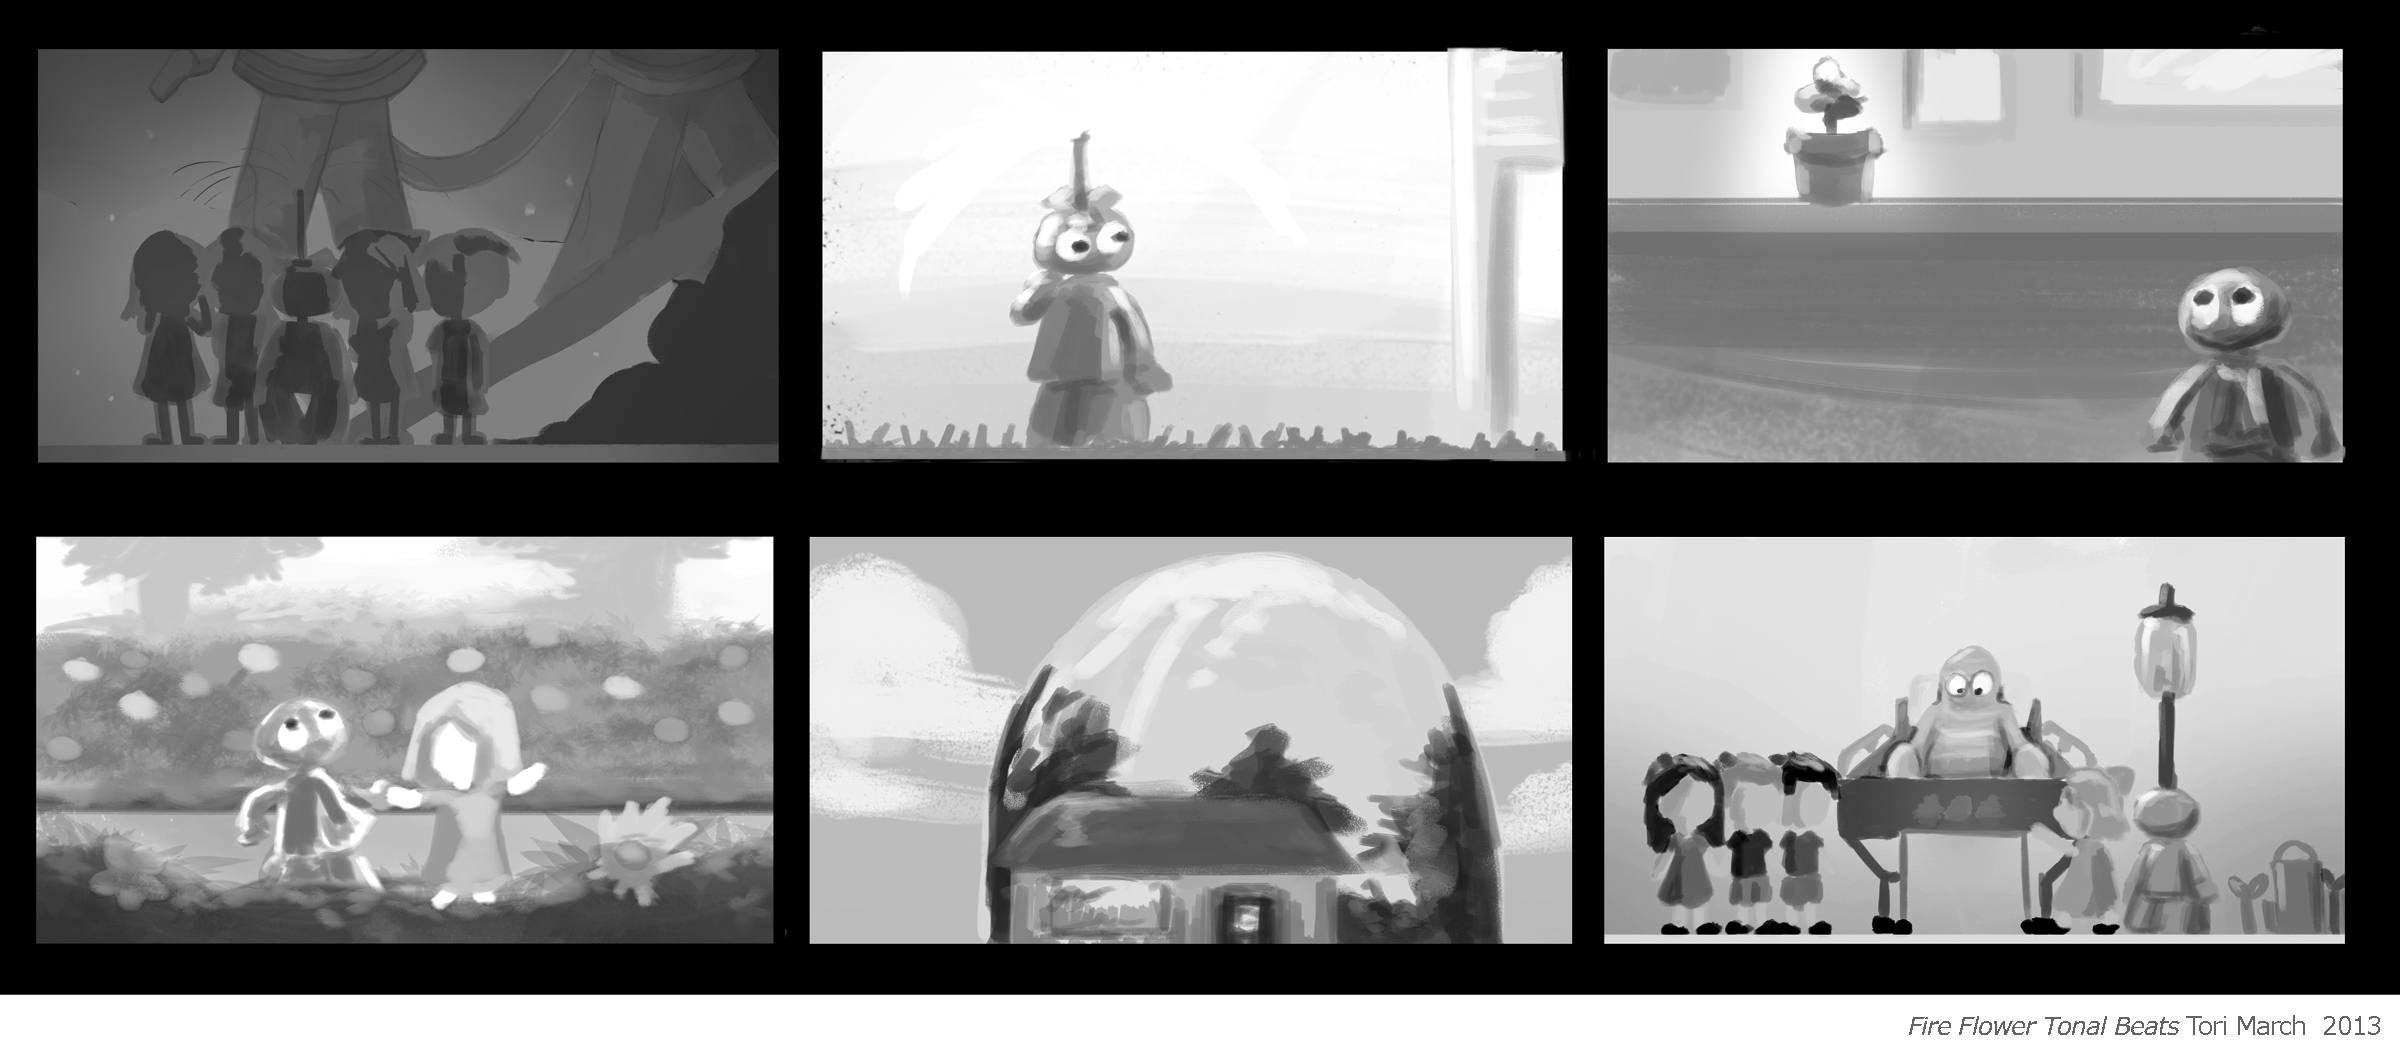
2. CREATING TONAL KEYS (6 to 9 panels)
Tonal Palette: Choose the key story beats in your PSA to develop a visual guide for how lighting and tone will play in your final piece. Limit your palette to five swatches (white, black and three grays). If time allows you will eventually apply these tones to every scene in your animatic.
EXAMPLE:
Go here for detailed instruction on how to build a Tonal Key in Photoshop.
Submission/Specs:
- 6-9 panels worked in a single Photoshop document.
- Export as a single .jpg
- Upload to the Basecamp 308_Storyboarding for Digital Media/308_dropbox
Naming: simpsonB_workingTitle_tonalScript.jpg
3. SCENE BUILDS I. SHOT COUNTS & BLOCKING
Based on the feedback from your Action Beats, you should have a pretty good idea where you need to make adjustments, what bits need to be left out, and where you'll need to add shots to make the story flow better. Once you have made these revisions, it's time to start building out your scenes in Photoshop or Storyboard Pro.
WORKFLOW:
Step 1. Establish Shot Count: By grouping panels into "Shots" you can indicate where there are hard cuts or dissolves, and panel changes indicating actions within a "Shot". Once panels are groped appropriately you can the Batch Renaming tool in Adobe Bridge to update your shot count.
Step 2. Staging: You'll want to know where your characters are in relation to the camera. For complex scenes you'll want to create a Production Map from a bird's-eye perspective and plot out the relationship of your characters to the camera.
Step 3. Build Each Shot in it own Photoshop File: Import original thumbnails from each shot into seperate PSD files, and build out each shot as needed for cinematic impact and visual continuity. Most scenes will break down into foreground, mid-ground and background elements which will correspond nicely into PSD layers.
Step 4. Set up for multi-panel scenes: Once the elements of your shot have been built in Photoshop, use "Comp Layers" generate multiple panels.
Step 5. Export & Renumber Panels: Export new panels with the "Comp Layers to Files" export tool and use Bridge Batch Renaming to renumber your panels. Numbers for shots and letter for panels. Example: 01a, 01b, 01c, 02a, 03a, o3b, etc.
Step 6. Submit Panels to Basecamp: Name Panels folder, Zip and Upload to Basecamp.
SUBMISSION: Basecamp 308_dropbox/Final Project
NAMING: simpsonB_workingTitle_042521.zip
4. SCENE BUILDS II. CAMERA MOVEMENT
Give some thought to how camera motion can add impact to your film, hieghten emotions or even simplify your storytelling. At this stage you will choreograph camera movement and character blocking to create a seamless flow from scene to scene.
WORKFLOW:
Step 1. Plot Camera Moves & Animate Layers: Determine where camera motion and animated layers can best serve your piece.
Step 2. Build Camera Moves in Photoshop: Then build out these shots in Photoshop using Comp Layers and the Camera Move tool. Then to export panels and renumber in Adobe Bridge.
5. STORYREEL I. ROUGH CUT EDIT
Give some thought to how camera motion can add impact to your film, hieghten emotions or even simplify your storytelling. At this stage you will choreograph camera movement and character blocking to create a seamless flow from scene to scene.
WORKFLOW:
Step 1. Plot Camera Moves & Animate Layers: Determine where camera motion and animated layers can best serve your piece. Then build out these shots in Photoshop using comp Layers to export multiple panels per shot.
Step 2. Import Panels into Adobe Premiere:
Step 3. Timing/Tempo Track: Choose a tempo track that suits your story and import it into Premiere. Mute the audio on the Tempo Track and use the visual ticks to guide your editing. In the Timeline mode, drag your panels along the timeline to create a rough cut of your storyreel. Use the tempo track a a guide to help regulate the pacing of your storyreel.
Step 4. Sound Effects and Score: Sound is arguably the most cost effective way to bring presence to your animatic. Scratch sound effects can go along ways toward selling an animatic. Temp score is effective too but be careful not to overwhelm the timing of your piece with an ill-fitting piece of music. Good timing is more important than emotional tone at this stage of the game. With a little effort we should be able to do both.
Step 5. Export Movie and Review: Once you have exported your final storyreel be sure to watch it in Quicktime pro. It will feel different that in SBP. Take notes while your reviewing your work, make needed revisions and reexport.
Step 6. Export & Submit Storyreel: Once you like what you see rename the movie file and submit it.
SUBMISSION: Basecamp 308_dropbox/Final Project
NAMING: simpsonB_workingTitle_042521.mp4
6. STORYREEL II. FINAL REVISIONS & STORY TREATMENT PDF
After applying any notes from your rough cut review to your Final Storyreel, combine your Story Treatment elements into a single .pdf file. Submit the both to the Basecamp 308_Dropbox/Final Project.
1. STORYREEL – A finished movie of your project should be submitted at 1920 x 1080 H624 Compression. Be sure to include a six-digit date to the file name.
SPECS:
NAMING: simpsonB_Final_bigRobot_092920.mp4
- Title card
- Must include scratch audio - Sound fx and score combined are recommended.
- Final credits - Include a separate panel for audio effects and music credits.
- Size and compression: 1920 x 1080 .mp4
2. STORY TREATMENT PDF - Include the following as a single PDF file.
SPECS:
- Cover Image from your Storyreel. Color is optional.
- Title - Give your project a brief descriptive title. Example: "Big Robot"
- Story Synopsis - Write a short paragraph describing the arc of your story (ie. beginning, middle and end).
- Character Questions - for each central character. What do they want? What is getting in their way? & ultimately, What do they need?
- Seven Story Sentences - Once upon a time, etc.
NAMING: simpsonB_Final_bigRobot.pdf
Stephan Leeper/Central Michigan University 2023